Last updated: November 19, 2026
Quick Answer: in most cases, you can narrow down how to fix streaks and lines in printer output in 2 steps—run a nozzle check, then run one cleaning cycle before you replace parts. Streaks and lines in printer output usually point to a dirty nozzle, a tired toner cartridge, a worn drum unit, or debris in the paper path. Start with a nozzle check, then run the printer’s built-in cleaning cycle before you replace parts. The steps below will help you narrow it down fast.
Key Takeaways
- A nozzle check tells you if the problem is in the ink path, not the file.
- Light streaks often come from dust, dried ink, or a low cartridge.
- Dark vertical lines on laser pages often point to toner or drum wear.
- Run one maintenance cycle, then print a test page before you swap parts.
- If the defect repeats in the same place on every page, the hardware is the likely cause.
Start with the nozzle check and test page
Picture this: you print a report and see faint stripes cutting across the text, but only on some pages. First, try a nozzle check or the built-in test page; that tells you whether the fault lives in the printer or in the file you sent. If the pattern already shows up there, the machine is guilty.
On many inkjet models, the nozzle check sits in the maintenance menu on the control panel or in the printer software on your computer. Print it once, then compare the pattern with the sample in the manual. Missing gaps, broken bars, or thin white lines mean ink is not firing cleanly. A clogged head can look like a tiny comb with teeth missing.
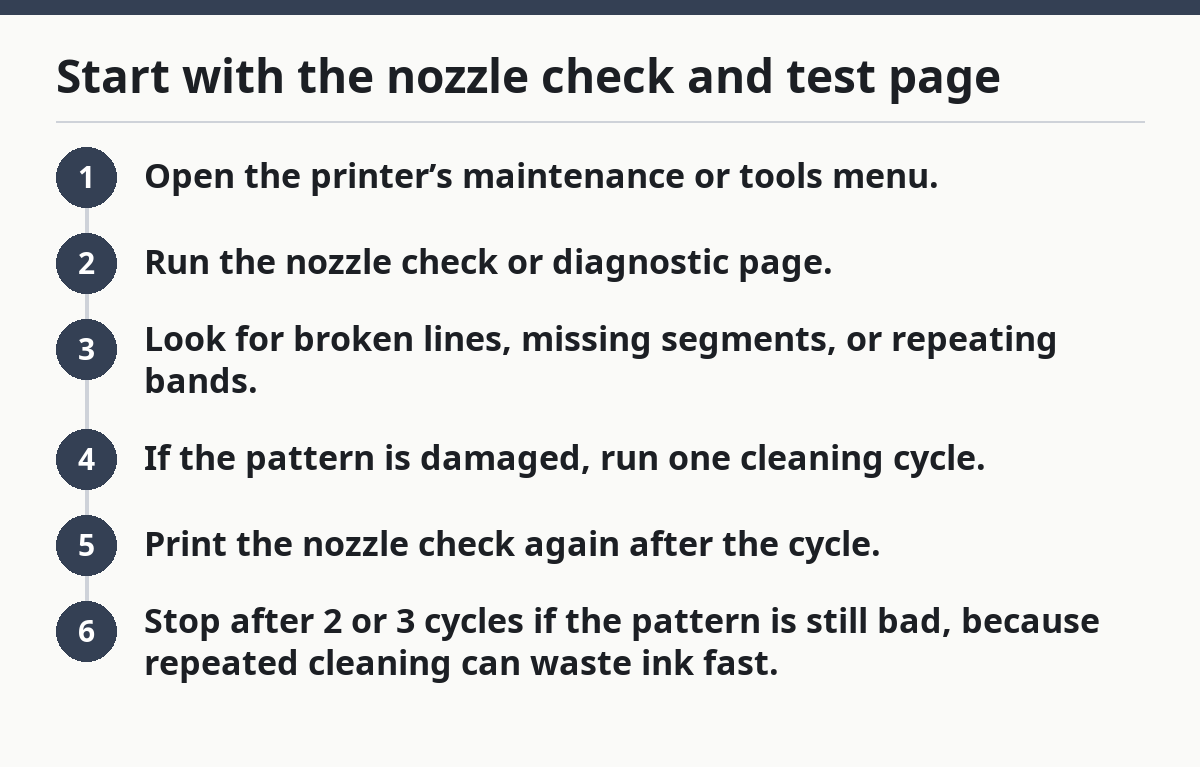
- Open the printer’s maintenance or tools menu.
- Run the nozzle check or diagnostic page.
- Look for broken lines, missing segments, or repeating bands.
- If the pattern is damaged, run one cleaning cycle.
- Print the nozzle check again after the cycle.
- Stop after 2 or 3 cycles if the pattern is still bad, because repeated cleaning can waste ink fast.
This step costs almost nothing except a sheet or two. Clean test page, messy document? Then the file, driver, or paper choice may be at fault instead of the hardware. Light gray shading can also hide a problem that black text won’t show.
Why the built-in cleaning cycle matters
The built-in cleaning cycle fixes many streaks caused by dried ink, minor clogs, and weak flow, especially after the device has sat for 2 weeks or longer. It works on the printhead path, not the paper, so it is the right next move after the nozzle check. One cycle can help a lot; too many, though, can fill waste ink pads and drain cartridges.
Use the cleaning function from the printer’s menu or the driver on your computer, then print a fresh test page. If the lines fade but do not disappear, wait 10 to 15 minutes and run one more cycle. That pause gives the ink a chance to settle and can keep you from overcleaning. Honestly, patience here beats panic.
- Use the standard cleaning option first.
- Save the deep-clean or intensive option for stubborn clogs.
- Print a test page after each cycle.
- Check the ink levels before repeating the process.
Don’t keep running cleanings if the result barely changes. That usually means the issue is not dried ink alone. It may be a failing printhead, a nearly empty cartridge, or debris caught where the paper passes through. On many models, the manual lists the cleaning routine as a maintenance cycle, and if the manual does not clearly explain the procedure, consult a qualified printer technician or the manufacturer’s support page before repeating it too many times.
What if the lines are only on one side of the page?
Picture this: the left margin looks fine, but the right edge has a gray streak or a dark vertical stripe on every sheet. That pattern often points to the toner cartridge or drum unit, especially on laser devices. A repeating line in the same spot on multiple pages is a hardware clue, not a document clue.
First, remove the cartridge and inspect the visible surfaces for toner dust, scratches, or loose material. If the cartridge has a built-in drum, look for marks on the drum surface without touching it with bare fingers. If the cartridge or drum is separate, reseat both parts firmly and print again. In practice, this is where many people chase the wrong culprit first.
- Power off the device and open the front cover.
- Remove the toner cartridge and drum assembly carefully.
- Check for spilled toner, torn seals, or a scratched drum surface.
- Reseat the parts and close the cover fully.
- Print a test page to see whether the line moved, faded, or stayed put.
- Replace the worn part if the streak stays in the same place.
A dark vertical line that repeats at exact intervals usually means drum wear or contamination on a roller. A fuzzy gray band can mean toner leakage. If the cartridge is nearly empty, shake it gently only if the maker allows that method; some cartridges do not respond well to it. If the page still shows the same line after reseating, replacement is the honest fix.
How do I stop streaks when printing?
Stop streaks when printing by checking the paper path, the paper itself, and the print quality settings before you buy parts. Paper dust, torn labels, and warped sheets can leave marks that look like a bad cartridge, and a fast draft setting can make the defect more obvious. The goal is to rule out the cheap fixes first.
Open the access doors and look for scraps of paper, sticky residue, or loose toner in the path where sheets travel. Use a lint-free cloth for dry dust only. If the manual allows it, use the paper path cleaning option or feed a cleaning sheet through the device. Do not force anything through the rollers. Careful hands save headaches.
- Remove any curled, damp, or wrinkled paper from the tray.
- Check for labels, envelopes, or glossy stock that the model does not support.
- Load plain paper that matches the manual’s weight range.
- Set print quality to normal instead of draft for the next test.
- Try a fresh stack from a sealed ream.
The paper itself can be the problem. Reams stored in a humid room pick up moisture, and that can cause smears, shadows, and uneven lines. Cheap paper sheds more dust, which builds up on rollers and glass. If a clean test page still streaks after you swap paper, the defect is inside the machine.
For more on how to fix streaks and lines in printer output, the printer’s paper guidance and your model’s support page can help identify supported stock types before you test again. A sealed ream and the correct weight range make a measurable difference in some cases.
When the printhead is the real problem
Picture this: the same pale line appears across every photo and text page, even after a cleaning cycle and a fresh cartridge. That pattern often means the printhead is clogged, worn, or misfiring, especially on inkjet models. If the printer has separate ink tanks, the head can be the part that fails first.
Use the maintenance menu to align or clean the head only if the model supports it. Alignment can fix banding that comes from slight misplacement, while cleaning targets blocked nozzles. On some machines, the maintenance cycle includes both. If the manual offers a head recovery or deep cleaning function, use it once, not as a daily habit. Some fixes are sprinters; this one is a marathon.
A printhead problem tends to show one or more of these signs:
- repeated white gaps in text or graphics
- bands that show up across the full width of the page
- missing colors in a test pattern
- streaks that remain after new ink is installed
If the defect does not change after the cleaning cycle, nozzle check, and alignment, the head may need replacement or service. That is the point where home fixes stop paying off. The machine is telling you the same thing in three different ways.
For broader checks on related print-quality issues, the hub on printer output quality and color management is the right next stop. If you are comparing models, HP’s support pages and Epson’s user guides are useful references for model-specific maintenance steps.
What not to keep trying
Picture this: you’ve already run three cleanings, swapped paper, and rechecked the cartridge, but the same stripe keeps showing up. At that point, more trial and error usually wastes ink or toner without fixing the source. The better move is to stop repeating steps that have already failed.
Do not keep printing 20 pages of tests if the first two already proved the fault is repeatable. Do not ignore a line that appears in the exact same spot on every sheet. That pattern is classic wear, not randomness. Chasing it further is like polishing a broken hinge.
Common mistakes that cost time:
- running the cleaning cycle over and over, which burns ink and can fill waste pads
- replacing the wrong cartridge when the drum is the part at fault
- using damaged or damp paper, then blaming the printer
- cleaning the paper path with a wet cloth where the manual calls for dry cleaning only
If the machine still streaks after one cleaning cycle, a nozzle check, fresh paper, and a cartridge or drum reseat, it needs service or replacement parts. A model-specific manual or support line can confirm whether the issue points to the cartridge, drum unit, or the printhead. That is the line where home troubleshooting ends. For related help, see the printer maintenance guide and the troubleshooting steps for print quality.
FAQ
Why does my printer leave lines on the page?
Lines usually come from a clogged nozzle, a dirty paper path, a worn toner cartridge, or a bad drum unit. If the lines show on a nozzle check or test page, the problem is inside the machine, not the file you printed. A repeating line in the same place points more strongly to hardware wear.
How do I stop streaks when printing?
Run a nozzle check, then a single cleaning cycle, then print again on fresh paper. If the streaks stay, inspect the toner cartridge, drum unit, and paper path for dust or wear. Avoid repeated cleanings unless the manual calls for them, because they waste consumables and often miss the real fault.
Is a streaky printhead a sign I need maintenance?
Yes, a streaky printhead often means the machine needs maintenance. If the streaks improve after one cleaning cycle, the head likely had a minor clog; if they stay after cleaning and alignment, the head may be worn or damaged. At that point, the model manual or service team should guide the next step.
Drafted with AI; not yet reviewed by a person.