Last updated: November 19, 2026
Quick Answer: For most office documents, 300 dpi, PDF with OCR, and a fixed folder structure is the safest starting point for scan quality, file handling, and capture workflow. Bad scan quality, messy file handling, and a clumsy capture workflow turn a simple digitizing job into a search-and-replace nightmare. The right setup gives you readable scans, predictable file names, and a workflow that does not collapse when volume goes up. This guide sorts out what matters, what does not, and which path fits your situation.
Key Takeaways
- Scan quality is not one thing; resolution, contrast, color mode, and page prep all pull in different directions.
- File handling gets easier when naming, folders, and formats are decided before the first page goes through the feeder.
- A capture workflow should match the job: one-page receipts, 200-page contracts, and mixed paper stacks need different settings.
- The most resilient process is the one that can handle real mess: skewed pages, blank backs, bent corners, and duplicate scans.
- If you skip QA on the first batch, you usually pay for it later in rescans and manual cleanup.
What actually makes a scan “good”?
A scan is “good” when the text is legible, the file opens fast, and the output still works after OCR, storage, and sharing. That usually means 300 dpi for normal text, a clean PDF, and a file size that fits the job. If the source is tiny print, a faded fax, or handwriting, the answer changes fast.
Picture this: you’re scanning a stack of contracts, and the pages look fine on screen until OCR misses key names and dates. The image may look sharp, but the workflow fails because the text layer is weak or missing. That is why scan quality has to be judged by the end use, not by a quick glance.
According to the Library of Congress, file formats and image quality choices matter because preservation and reuse depend on readability over time. Likewise, PDF Association guidance on PDF/A emphasizes long-term use cases rather than appearance alone. The truth is, a few choices do most of the damage:
- Resolution: 200 dpi can work for simple documents, but 300 dpi is the common safe point for office text.
- Color mode: black-and-white is small, but grayscale often handles stamps, pencil marks, and low-contrast text better.
- Compression: aggressive compression can crush detail and make OCR worse, especially on faint type.
If the page is purely typed text, a 1-bit black-and-white PDF may be enough. If the page has highlights, signatures, colored notes, or pale stamps, grayscale or color is safer. If you need evidence-grade copies, such as records that may be reviewed later, keep the file as close to the source as practical.
A second mistake is trusting the scanner’s “auto everything” button. Auto exposure can save time, but it can also wash out light pages or darken gray text into mush. On a mixed batch, one bad auto setting can ruin 30 pages in a row.
Use this quick filter:
- If the text is clean, typed, and normal size, start at 300 dpi.
- If the page has photos, marks, or stamps, use grayscale or color.
- If file size matters more than perfect image quality, test compression on 3 pages first.
- If OCR matters, inspect the text layer on 5 sample pages before scaling up.
- If the page is tiny or faded, raise resolution before you raise sharpening.
Quick check: if you care more about readable text than tiny file sizes, you’re in the 300 dpi, PDF, OCR-first path.
The 3 conditions that change everything
If the document is clean, the scanner is fed one page at a time, and the end result is just storage, the process is simple. If any one of those three changes, the workflow changes too. Paper condition, batch size, and final use decide almost everything.
Picture this: you’re handling a folder of old invoices from different years, and half the pages are wrinkled. The job is no longer “scan documents”; it is “separate bad originals, protect file order, and keep OCR usable.” The right settings for that job are not the same as for a neat set of unsigned forms.
| Situation | Best Path | Why Other Options Fail |
|---|---|---|
| Clean, typed pages | 300 dpi, duplex scan, PDF with OCR | Higher resolution only makes larger files without much gain |
| Mixed paper quality | Grayscale, manual review, split by condition | Full auto usually misses faint text or boosts background noise |
| Receipts and small slips | Higher dpi, tight cropping, image cleanup | Standard office settings clip edges and lose line items |
| Multi-party contracts | Straight page order, consistent naming, PDF/A if required | Image-only files make search and review harder later |
| Archive or compliance work | Keep originals, lock naming rules, check retention policy | Loose file handling creates gaps you cannot prove later |
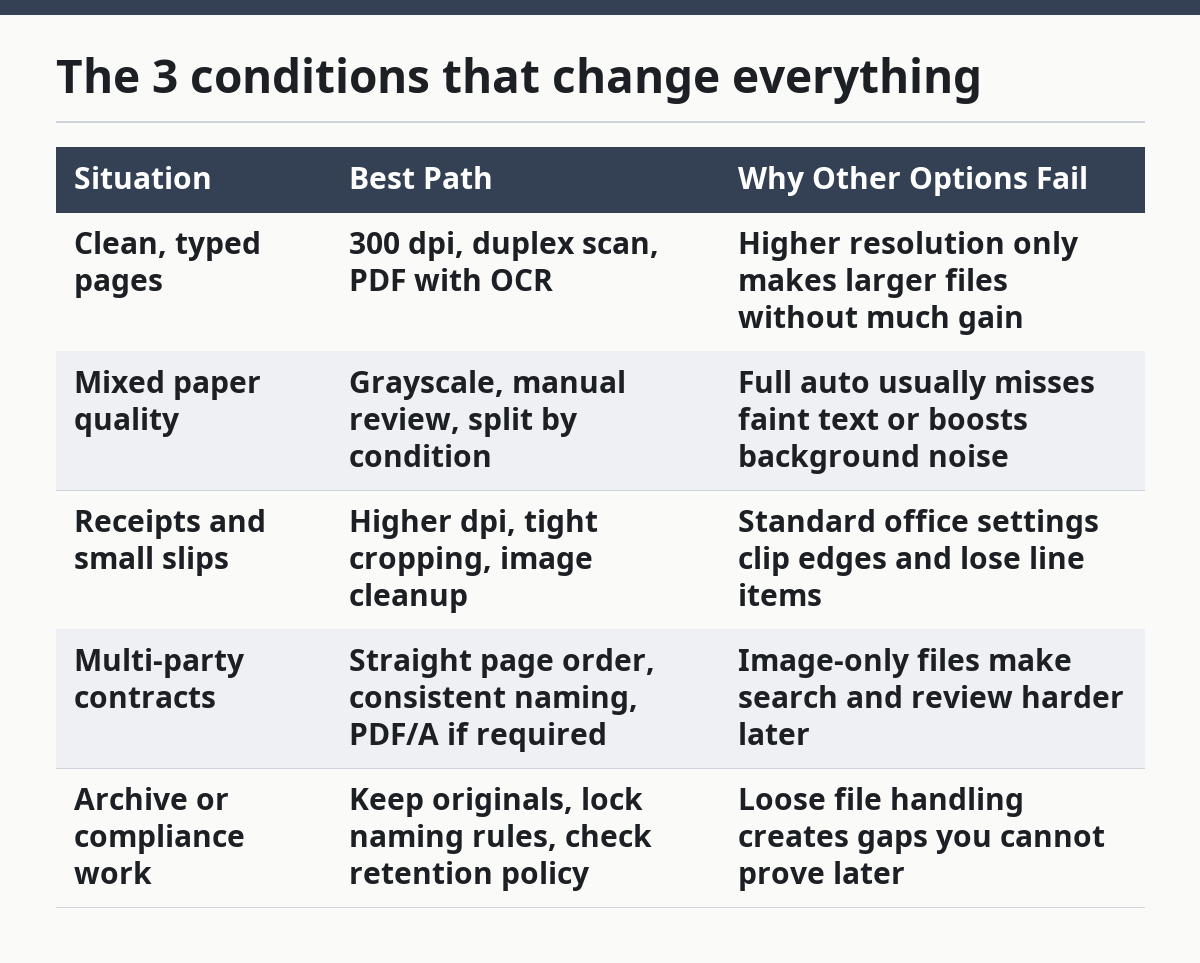
If the source is mixed, do not force one scanner profile on everything. Split the stack into buckets: clean typed pages, low-quality pages, oversized sheets, and special items like photos or forms with carbon copy marks. That may sound fussy, but it is often faster than rescanning a whole batch because the OCR failed on the worst pages.
A practical rule: the cleaner the page, the more you can compress. The uglier the page, the more you should protect image detail.
Use this decision path:
- Sort the originals by quality before scanning.
- Decide whether OCR is required for search.
- Set the base resolution to 300 dpi for standard text.
- Switch to grayscale for low-contrast pages.
- Run a small sample and inspect both image and OCR output.
- Save the batch only after the sample passes.
- If one subgroup fails, change the profile for that subgroup only.
A lot of generic advice gets this wrong by treating scanning like photography. Before you follow that advice, consult a document-imaging professional or a records specialist if the material is regulated or long-lived. A scan has one job: preserve text and order with the least friction. The PDF Association and the Library of Congress both stress format and reuse considerations, which is why document scanning needs a different mindset than photography.
Quick check: if your paper stack has more than one quality level, you need separate profiles, not one “best” setting.
How should you set up file handling?
File handling should start before scanning, not after the folder fills up. A boring file system is the safest one: fixed names, fixed folders, and a format policy you can repeat without thinking. If you wait until the end to name files, you will lose time and make mistakes.
Picture this: you’ve scanned three months of paper, and the folder holds scan1.pdf, scan2.pdf, and final-final-2.pdf. The files exist, but they are already broken for real use because no one can trust the names or tell which version is current. That is a file handling failure, not a scanning one.
A clean handling plan has four parts:
- Naming: use one pattern and stick to it, such as
YYYY-MM-DD_Client_DocType_Version. - Folder structure: separate intake, in-progress, reviewed, and archived files.
- Format choice: PDF for documents, TIFF for high-fidelity image archiving in some workflows, JPEG only when image quality is secondary.
- Version control: never overwrite the master scan without a reason and a backup.
The hard part is not making a name. It is making a name that still works six months later. Dates usually help. Person names can help if your team uses the same spelling. Short document types help more than clever labels.
Then, once the naming rule exists, it becomes easier to move files in a way that is predictable for everyone.
Use this workflow:
- Create a root folder for the project or client.
- Add subfolders for
01_Inbox,02_Scan,03_QA, and04_Archive. - Decide the file name pattern before the first scan starts.
- Save each batch to the inbox folder, not the archive.
- After QA, move the file once into archive.
- Keep a log sheet if the batch has exceptions or rescans.
- Back up the archive to a second location.
A common trap is putting everything in one folder and trusting search. That works until you have 400 files with similar names. Another trap is using different naming rules for each person on the team. That creates a small mess every day and a huge mess a quarter later.
If you need searchable records, PDF with OCR is usually the base choice. If you need image fidelity for long-term preservation, you may need a different master format and a separate access copy. The honest trade-off is simple: the more preservation quality you keep, the less lightweight the file tends to be.
Quick check: if someone else has to find the file in 90 seconds, your naming and folder rules are not optional.
What should a capture workflow look like from start to finish?
A capture workflow should move in one direction: prep, scan, check, fix, store. If the job has no review step, it is not a workflow — it is a gamble. Good capture work is less about fancy software and more about a repeatable sequence.
Picture this: you need to process a 100-page packet with handwritten notes, two blank backs, and a folded corner on page 37. If you scan it straight through without checks, one jam or one skipped page can break the whole set. A strong workflow catches that before the file is handed off.
Here is the path that holds up in real use:
-
Prep the originals
Remove staples, paper clips, and sticky notes that block feed paths. Flatten folds and check for torn edges. -
Set the scanner profile
Pick resolution, color mode, duplex, and file format before the first page. -
Scan in batches
Break large jobs into smaller sets so errors are easier to catch. -
Check the first few pages
Look for skew, blur, blank pages, and missing backs. -
Run OCR if needed
Confirm the text layer works on names, dates, and key terms. -
Name and file immediately
Save to the correct folder with the agreed pattern. -
Review for exceptions
Fix rotated pages, split bad batches, and rescan only what failed. -
Archive and back up
Move the final file and protect the master copy.
The workflow changes by document type. A receipt job may need tighter cropping and more image cleanup. A legal packet may need page order preserved more strictly. A photo job may need color accuracy more than OCR. The wrong mistake is to use the same routine for all three.
Now, you might be wondering whether more automation is always better. The answer depends on the document, because auto deskew, auto rotate, auto blank-page removal, and auto contrast can help, but they can also make mistakes that are hard to spot later. Blank-page removal is especially risky if the back side has a faint stamp or notes.
Use automation where it removes obvious friction, and use human review where the page carries meaning. That split saves time without handing control to the software.
Quick check: if a missed page would hurt you more than a slow batch, build review into the workflow now.
Which file formats and standards matter most?
PDF, PDF/A, TIFF, and OCR text layers matter most because they control what happens after capture. If the scan is for daily use, PDF with OCR is the common path; if it is for long-term archiving, PDF/A deserves a hard look. The format should match the job, not the habit.
Picture this: you scan a signed agreement and save it as an image-only file because it was the default. It opens fine, but nobody can search names or clause numbers inside it. The scan exists, yet it behaves like a picture instead of a record. That is a format problem.
Here is the practical split:
- PDF: good for most office documents, easy to share, easy to open.
- PDF with OCR: better when search and copy-paste matter.
- PDF/A: used in preservation workflows where long-term readability matters more than bells and whistles.
- TIFF: useful in some archive systems and for preserving image detail.
- JPEG/PNG: fine for single images, weak for multipage document work.
There is no free lunch here. PDF is convenient, but some file systems and compliance rules prefer PDF/A. TIFF can preserve image quality well, but it is less friendly for casual sharing. JPEG is small, but it is the wrong shape for most paper records.
Standards matter too. If your team needs an archive policy, PDF/A gives you a format with stricter rules about embedded content and future readability. That does not mean every scan must be PDF/A. It means the archive copy and the working copy may need different treatment.
Use this format rule set:
- If the file is for everyday sharing, choose PDF with OCR.
- If the file is for long-term storage, check whether PDF/A is required.
- If image fidelity matters more than convenience, ask whether TIFF is the archive master.
- If the page is just a photo or simple image, use image formats only when a document format is not needed.
- If your system has a retention policy, follow that policy before choosing a format.
For authoritative guidance, the Library of Congress has preservation guidance on file formats, and the PDF Association publishes material on PDF/A. Those are the kinds of sources worth checking when your workflow has compliance or archive rules.
Quick check: if someone may need to search the file later, image-only output is probably the wrong choice.
The edge cases that break normal advice
Edge cases matter because they are where the boring workflow fails first. If the document is damaged, mixed, or regulated, the normal settings stop being normal. That is where a lot of generic advice falls apart.
Picture this: you have a batch with folded invoices, a thermal receipt, a legal contract, and a faxed page in the same stack. One scanner profile will not treat all four well. The better answer is to split the batch and change the workflow by document type.
-
Thermal receipts
What changes: thermal print fades, and small text disappears fast.
What to do instead: scan sooner, use higher resolution, and keep a backup copy before the print degrades. -
Oversized pages
What changes: the feeder may clip the edges or skew the page.
What to do instead: use flatbed capture or a scanner path that handles larger sheets without truncation. -
Very low-contrast pages
What changes: auto settings may erase the text or smear the background.
What to do instead: try grayscale first, then adjust contrast manually on a sample batch. -
Mixed duplex stacks with blank backs
What changes: auto blank-page removal can drop pages you meant to keep.
What to do instead: review blank-page settings and keep a visual check on the first batch. -
Handwritten forms
What changes: OCR accuracy falls, especially with cursive or faint pen.
What to do instead: treat OCR as a convenience, not a guarantee, and keep the image legible for human review. -
Compliance or retention files
What changes: the scan is no longer just a convenience file; it may be a record.
What to do instead: confirm naming, retention, and format rules before the capture run starts.
A lot of people miss the point here: edge cases are not rare in business scanning. They are the reason the workflow needs rules. If you know a certain document type is fragile, make a separate path for it.
Use this exception checklist:
- Identify the weird pages before scanning.
- Pull them out of the main batch.
- Give them a setting that fits their condition.
- Review those files by hand.
- Save notes if the workflow needed a one-off change.
Quick check: if one bad page can ruin the whole set, you need exception handling, not a faster scanner.
How do you keep quality high without slowing the team down?
You keep quality high by standardizing the boring parts and reviewing only the risky parts. The most effective process is fast because it avoids rework, not because it skips checking. That is the part most teams get backwards.
Picture this: you run a daily scan queue and everyone improvises the settings. One person uses grayscale, another uses color, and a third changes file names by mood. The team is busy, but the output is chaos. A small rule set beats heroic cleanup every time.
A practical team workflow looks like this:
- Choose one scanner profile for each document class.
- Post the file naming pattern where the work happens.
- Assign a first-batch check to one person.
- Use a short QA list: page count, legibility, order, OCR, and file name.
- Define when a page is rescanned and who signs off.
- Keep one archive rule for everyone.
If volume is low, manual review can be complete. If volume is high, review the first batch, the first page of each new type, and any file that trips a rule. That keeps the queue moving without handing quality over to luck.
The best part is that you do not need fancy software to get most of the benefit. A clear naming standard, a scan profile template, and a QA checklist remove a lot of failure points. A DMS or capture platform can help, but it does not fix a weak process by itself.
Use these tools where they help:
- Scanner profiles for repeatable settings
- OCR software for searchable text
- Batch review for catching missed pages
- File naming templates for consistency
- PDF/A export where archive policy requires it
The trade-off is plain. More control means more setup. Less setup means more cleanup. The right balance depends on how often you scan, how messy the paper is, and how costly a mistake would be.
For file-format and preservation guidance, the Library of Congress is a useful reference point, and PDF Association material on PDF/A can help when archive rules matter. For OCR and accessibility expectations, document-handling guidance from standards bodies and professional associations is worth checking before you lock a workflow.
Quick check: if the cost of a mistake is higher than the cost of a checklist, the checklist wins.
FAQ
What resolution should I use for document scans?
For normal text, 300 dpi is the safest starting point. If the page is tiny, faded, or packed with fine print, you may need to go higher. If the page is clean and simple, higher resolution may only make the file bigger without improving the result much.
Should I save scans as PDF or TIFF?
For everyday document use, PDF is usually the better fit because it is easy to share and can include OCR. TIFF is better when your workflow needs a high-fidelity image master or a specific archive system. The right choice depends on whether search, sharing, or preservation matters most.
Is OCR always worth using?
OCR is worth using when you need search or copyable text. It is less useful for pages with heavy handwriting, poor print quality, or lots of background noise, because the text layer may be incomplete. If OCR accuracy matters, check a few sample pages before trusting the batch.
How do I stop my scan folders from becoming a mess?
Use one naming pattern, one folder structure, and one archive rule from the start. A simple split like inbox, scan, QA, and archive keeps files from drifting into random folders. If more than one person touches the files, the rule has to be written down, not remembered.
What should I do with mixed-quality paper?
Split it before scanning. Clean typed pages, faint pages, receipts, and oversized sheets usually need different settings, and forcing them into one profile causes rescans later. The simplest fix is to batch by document condition, not by whatever is on top of the stack.
Drafted with AI; not yet reviewed by a person.