
Last updated: November 18, 2026
If your printer is connected but not behaving, the first fix to try is the printer driver. This guide on how to install or reinstall printer drivers shows when to install the correct driver from the manufacturer support site, or reinstall it if Windows or macOS is using a corrupted or wrong one.
Key takeaways
- The printer driver is the software that lets your computer talk to the printer model you own, such as an HP LaserJet, Canon PIXMA, Brother HL series, or Epson EcoTank.
- Start with the manufacturer support site, not a random driver site, so you get the exact package for your printer and operating system.
- If the printer used to work and suddenly stopped after an update, reinstalling the driver can help; if the model is wrong, the cable is bad, or the printer is offline, a reinstall will not fix that.
- On Windows, Device Manager is often the most direct place to remove a bad driver entry; on macOS, removing and re-adding the printer often forces a fresh driver choice.
- USB printers are often simpler to reinstall than network printers, because the computer can detect the device directly on the cable.
- If the manufacturer no longer offers a driver for your OS, use the built-in driver in Windows or macOS instead of forcing a mismatched package.
Install the right printer driver from the manufacturer

A practical way to install a printer driver is to download it from the manufacturer support site and match it to the printer model and your operating system. That means choosing the exact device name, such as Epson WorkForce WF-2850 or Brother HL-L2350DW, and the right version of Windows or macOS.
Start here when you are setting up a printer for the first time, moving it to a new computer, or replacing a driver that may have been corrupted. A random driver download page can hand you the wrong package, which usually creates a worse mess than the one you started with.
Use this order:
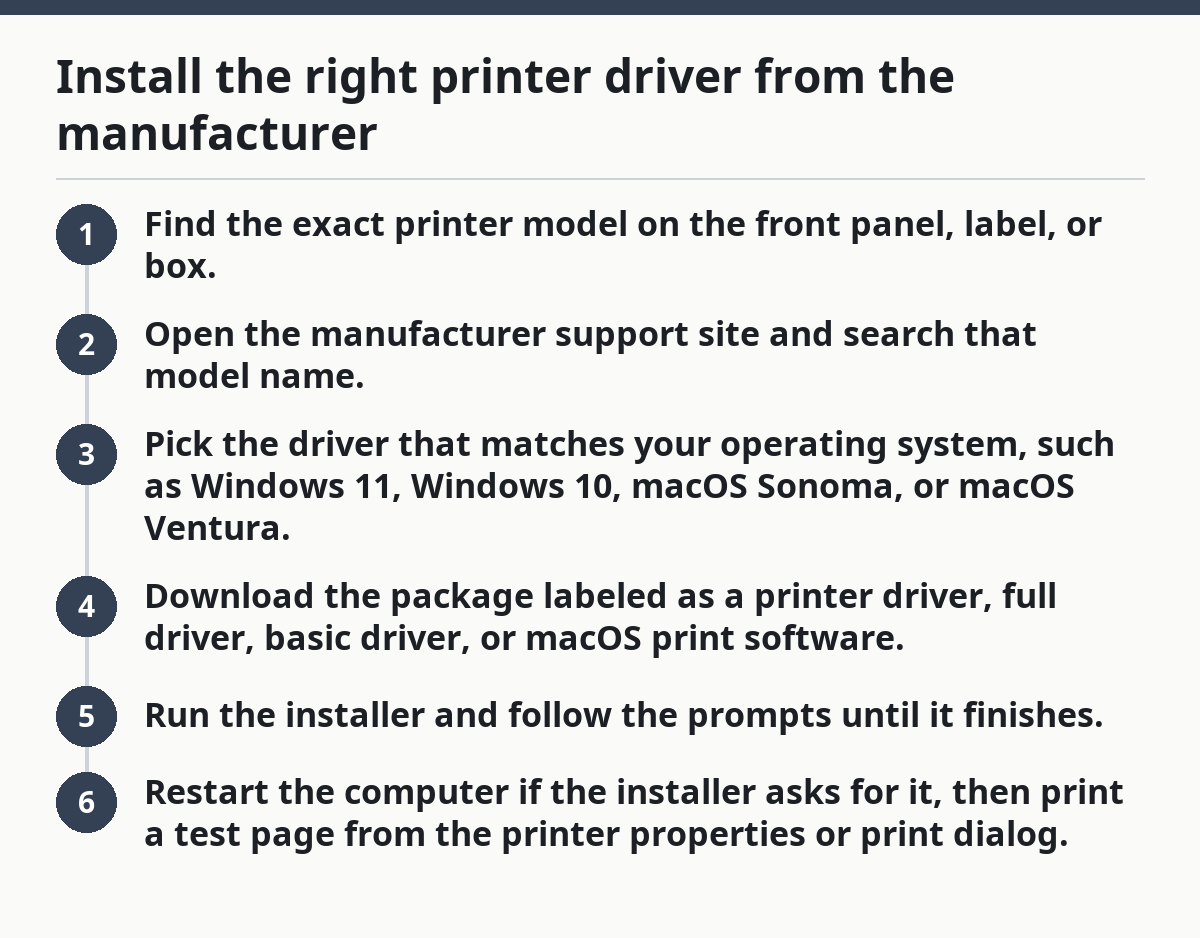
- Find the exact printer model on the front panel, label, or box.
- Open the manufacturer support site and search that model name.
- Pick the driver that matches your operating system, such as Windows 11, Windows 10, macOS Sonoma, or macOS Ventura.
- Download the package labeled as a printer driver, full driver, basic driver, or macOS print software.
- Run the installer and follow the prompts until it finishes.
- Restart the computer if the installer asks for it, then print a test page from the printer properties or print dialog.
A full driver package often installs more than the bare print engine. It may also add scanning software, status monitors, or a utility for ink levels. That can be useful on an all-in-one printer, but it also adds more moving parts. If you only need printing, the basic driver is often enough.
The trade-off is usually this: the manufacturer package is the best match for that model, but it is also the most model-specific. If you pick the wrong variant, the installer may fail, or the printer may appear under a generic name that does not expose duplex, tray, or color settings.
For a deeper fix flow, this article sits under printer troubleshooting and works best as the driver-specific branch of that guide. See also the printer troubleshooting guide, the Windows printer setup guide, and the macOS printer setup guide for related steps.
How do I reinstall printer drivers on Windows?
On Windows, reinstalling a printer driver usually means removing the old driver in Device Manager or Print Management, then adding the printer again. That is a clean way to replace a damaged driver entry without changing every other printer setting on the machine.
The exact screen names vary a little between Windows 10 and Windows 11, but the path is similar enough that most users can follow it in under 10 minutes.
- Disconnect the USB cable or turn off the printer if it is a network model.
- Open Settings > Bluetooth & devices > Printers & scanners.
- Select the printer and choose Remove or Remove device.
- Open Device Manager from the Start menu.
- Expand Print queues or Printers, then right-click the printer and choose Uninstall device.
- If Windows offers Delete the driver software for this device, check it when available.
- Restart the computer.
- Install the fresh driver package from the manufacturer support site.
- Reconnect the printer by USB or add it again from Printers & scanners.
Device Manager matters because it removes the device entry that Windows may keep reusing. If you skip it and only remove the printer from Settings, Windows can sometimes load the same broken package again after reboot. That is why a full reinstall on Windows is more than clicking “Remove device” once.
If the printer is a shared office model or uses a vendor utility, Windows may also keep a companion print monitor or port entry. In that case, the driver reinstall can succeed while the old port settings remain behind. That does not mean the driver step was wrong; it means the printer connection is still pointing at the old path.
A common mistake is downloading an “updated driver” from the computer vendor instead of the printer manufacturer. That often gives you a generic package that works for basic printing but hides advanced settings. Another mistake is reinstalling the driver before removing the old one. That can leave two versions installed, and Windows may choose the wrong one.
How do I reinstall printer drivers on macOS?
On macOS, reinstalling a printer driver usually means removing the printer from Printers & Scanners, then adding it again so macOS picks a fresh driver or the manufacturer package. That is often enough on versions that rely on AirPrint or built-in print support.
Open System Settings > Printers & Scanners on newer versions of macOS, or System Preferences > Printers & Scanners on older ones. Then follow this sequence:
- Select the printer in the list.
- Click Remove Printer or the minus sign.
- Restart the Mac if the printer keeps reappearing.
- Download the correct driver or utility package from the manufacturer support site if the printer needs one.
- Open the downloaded installer and finish the setup.
- Return to Printers & Scanners and click Add Printer, Scanner, or Fax.
- Choose the printer from the list, then check the Use field to confirm macOS selected the intended driver.
- Print a one-page test job.
The Use field is the important part. On macOS, that field may show the printer model name, AirPrint, or a manufacturer-specific driver. If it says the wrong model, or a generic option that does not match your printer, delete the printer and add it again before you assume the driver is fixed.
macOS can be forgiving when the printer supports AirPrint. In those cases, a separate vendor driver may not be necessary for basic output. That is helpful, but it is also the limit of the setup: if you need fax tools, job accounting, finishing options, or a scanner utility, the manufacturer package may still be the better choice.
The biggest mistake on macOS is chasing a driver when the printer has been added under the wrong kind of queue, such as a generic IP entry with the wrong protocol. Reinstalling the driver will not solve that by itself. The printer still needs the right port or discovery method, even if the software is perfect.
USB printer setup is the fastest reinstall path
A USB printer is often the easiest case because the cable gives the computer a direct signal to detect the device. When the printer is connected by USB 2.0 or USB 3.0, reinstalling the driver often comes down to removing the old entry, unplugging the cable, and letting the installer or operating system discover the hardware again.
This works well for home printers and small-office devices that only serve one computer. It is less useful for a printer shared over Wi-Fi or Ethernet, where the connection path matters as much as the driver.
Follow this sequence for a USB reinstall:
- Turn on the printer.
- Unplug the USB cable from the computer.
- Remove the printer from Windows or macOS.
- Uninstall the old driver if the system offers that option.
- Restart the computer.
- Run the manufacturer installer before plugging the cable back in, unless the installer tells you otherwise.
- Connect the USB cable to a direct port on the computer, not a hub if you can avoid it.
- Wait for the installer or system prompt to finish detecting the printer.
- Print one test page.
The direct-port detail matters. Some hubs and dock stations pass the signal poorly, especially when the printer needs to send status data back to the computer. A 1-meter cable plugged straight into the machine is often less trouble than a longer cable through a dock.
USB reinstall is not the right fix when the printer name in the operating system is correct but the device itself is unreachable over the network. In that case, the driver may be fine and the connection path is the real problem. This page does not cover network printer setup or printer offline repair; those are different jobs.
Why reinstalling the driver helps sometimes, and when it does not
Reinstalling the driver helps when the software layer is broken, but it does nothing when the printer, cable, queue, or network path is the real fault. That distinction saves time because a driver reinstall takes 5 to 15 minutes, while the wrong troubleshooting path can eat an hour.
A driver reinstall is worth trying when:
- the printer worked before a recent Windows or macOS update,
- the printer shows up with a generic or mismatched name,
- the print dialog lacks settings that should exist for that model,
- the installer reports a conflict or a missing component,
- Device Manager shows a stale or duplicated printer entry.
A driver reinstall is usually the wrong move when:
- the printer is powered off,
- the cable is loose or plugged into the wrong port,
- the printer is on the network but the computer cannot reach it,
- jobs are stuck in the queue,
- the printer is clearly offline in the operating system.
The cost of guessing wrong is simple: you may replace a working driver while the real problem stays untouched. That can create a second issue on top of the first one. A printer that was barely usable can become harder to diagnose because now there are multiple driver versions in play; if that happens, consult a qualified technician or the manufacturer support team.
If the manufacturer support site no longer offers a driver for your exact operating system, stop there and use the built-in Windows or macOS driver instead. Forcing an older package onto a new OS can cause partial functionality, odd permissions errors, or a setup that appears complete but never prints correctly. That is especially common with older USB-only models and discontinued office printers.
The practical rule is plain: reinstall the driver when the printer identity looks wrong or the software stack changed; look elsewhere when the printer identity is right but the device still cannot be reached.
Common mistakes that waste time during reinstall
The most common mistakes are installing the wrong model, skipping the uninstall step, and mixing old software with a new driver package. Those mistakes are fixable, but they cost another reboot and often leave the printer in a half-installed state.
One frequent error is choosing a driver for the printer family instead of the exact model. A “Canon PIXMA” download can contain several branches, and one branch may not support the cartridge set, scan button, or wireless chipset in your unit. A similar mistake is picking the wrong operating system version. A driver written for Windows 11 may not behave the same way on Windows 10, even when the installer allows you to continue.
Another mistake is keeping the old printer entry in the operating system while adding a new one. That creates duplicate queues, and the computer may send jobs to the stale queue. The result looks like a driver problem, but the root cause is two printers with the same name.
A third mistake is reinstalling from the printer first and the computer second. For USB printers, the cleaner order is usually: remove the old entry, uninstall the old driver, reboot, then install the new package. That sequence clears the old path before the new one arrives.
Finally, avoid downloading “driver updater” tools that promise to scan and repair everything in one click. They are not needed for a printer driver install, and they can install the wrong package faster than you can notice. The manufacturer support site or the operating system’s built-in print support is the safer route.
A quick check before you call it fixed
The installation is done when the printer appears under the right model name, the driver field matches the device, and a one-page test print comes out with the expected paper size and orientation. That is the clean finish line.
Check three things before you stop:
- the printer name matches the hardware on the desk,
- the operating system shows the intended driver or AirPrint entry,
- the test page uses the paper tray and size you expected.
If all three are true, the driver is installed correctly. If one of them is off, do not keep clicking random settings. Remove the printer again and repeat the install from the manufacturer support site or the operating system’s add-printer screen.
The habit that prevents most repeat failures is simple: keep the printer model, operating system, and driver package aligned. A 2019 printer can work on a current computer, but only if the software match is still valid. If the manufacturer has stopped supporting that model on your OS, built-in printing support may be the only stable option left.
Do I need to uninstall old printer drivers first?
Usually yes, especially on Windows. Removing the old printer entry and the old driver helps prevent duplicate queues and wrong-driver conflicts, which are common after an update or a model change. On macOS, removing the printer and adding it back often does the same job without a separate driver uninstall step.
How do I update printer drivers?
Update them by downloading the newest driver for your exact printer model from the manufacturer support site and installing it over, or after removing, the old one. On Windows, Device Manager can help replace stale driver entries; on macOS, remove the printer and add it again so the system can choose the newer package.
Where do I find the right printer driver?
The manufacturer support site is the safest place to start. Search the exact model name printed on the printer, then choose the file that matches your operating system, such as Windows 11 or macOS Sonoma. Avoid generic driver sites unless you have no other option, because the wrong package is easy to download and hard to undo.
Drafted with AI; not yet reviewed by a person.