Last updated: November 18, 2026
Quick answer: Most faded inkjet prints can be improved in about 5 minutes by checking ink levels, matching the paper type, and changing print quality from Draft to Standard or Best. This guide on How to fix faded prints from an inkjet printer walks through the fastest checks first.
Faded inkjet prints usually mean the ink is not reaching the page at full strength. The quickest fix is to check ink levels, set the job to the right print quality, and match the paper type before you run a longer clean. The steps below sort out which one is failing.
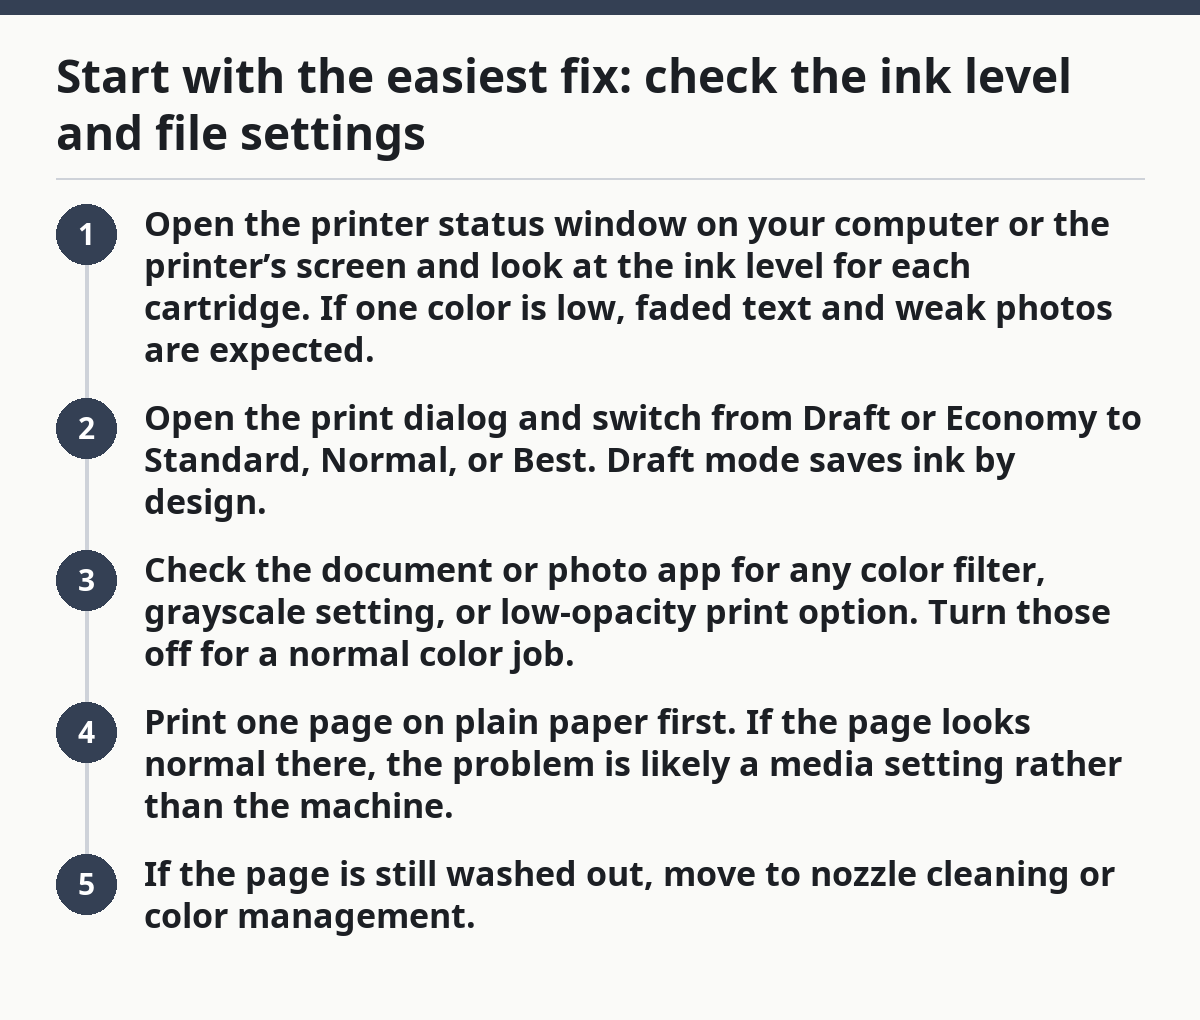
Start with the easiest fix: check the ink level and file settings
Picture this: you hit print on a report or photo, and the page comes out light gray, not black, or the colors look washed out. For How to fix faded prints from an inkjet printer, the first check is usually the fastest one. Faded prints from an inkjet printer often start with one setting or one empty color.
The first checks are simple: ink cartridge, print quality settings, and paper type. A cartridge can still show ink on screen and print badly if one color is low, and a draft mode can make text look thin even on good paper. The machine often is not broken at all.
- Open the printer status window on your computer or the printer’s screen and look at the ink level for each cartridge. If one color is low, faded text and weak photos are expected.
- Open the print dialog and switch from Draft or Economy to Standard, Normal, or Best. Draft mode saves ink by design.
- Check the document or photo app for any color filter, grayscale setting, or low-opacity print option. Turn those off for a normal color job.
- Print one page on plain paper first. If the page looks normal there, the problem is likely a media setting rather than the machine.
- If the page is still washed out, move to nozzle cleaning or color management.
A lot of people skip straight to cleaning. If the job is set to Draft on plain paper, cleaning will not fix a settings problem.
Why does my inkjet print look faded even with ink in the tank?
Faded inkjet output can happen even when the supply gauge looks fine, because the issue may be the paper choice, the nozzle pattern, or the color profile. Ink level is only one piece of the job.
A cartridge can have enough ink for a status screen and still underperform if the nozzles are partly blocked or if the wrong paper setting tells the machine to lay down less ink. Photo paper and plain paper do not behave the same way, and the driver needs to know which one you loaded.
Here’s the catch:
- Plain paper often needs a different setting than glossy or coated stock.
- Photo paper may look dull if the driver is still set to plain paper.
- Text can look light if the software is forcing a grayscale or “ink saver” mode.
- Some printers reduce ink density when the job is sent as a low-quality draft.
A quick test helps. Print the same 1-page file twice: once on plain paper with Standard quality, then again on the correct paper type with Best or Photo quality. If only one version looks right, you have a settings mismatch, not a bad machine.
A good reference for paper handling and print settings is your printer maker’s support page, and color workflow basics from the Adobe color management guides. Those two places usually explain the driver terms your model uses.
How do I make the print darker?
You make the print darker by raising the quality setting, choosing the correct paper type, and turning off any grayscale or toner-saving mode in the driver. That sounds simple, but the order matters.
Picture this: you need a darker invoice or a richer photo, and you already know the ink supply is not empty. The goal is to make the machine lay down more ink in the right places, not to guess at random settings until something changes.
Use this order:
- Set quality to Standard or Best. On many inkjet models, Draft is the main reason text looks too light.
- Match the paper type. Choose plain paper for copier paper, or the exact photo paper setting if you loaded coated stock.
- Turn off grayscale unless you need it. Some apps print lighter black text when a color-to-gray conversion is active.
- Check the color correction setting. If the driver offers “printer manages color” and “application manages color,” pick one path and stick with it for the test print.
- Run a nozzle check. A broken line pattern points to blocked nozzles, not a dark-mode issue.
If you print on plain paper and still get weak blacks, do not jump straight to replacement parts. First confirm the file itself is not light. A PDF with pale gray text, a thin font, or a faded source image will print that way on any device.
You can often fix the darkness problem in under 5 minutes once the driver is set correctly.
What if the nozzles are partly clogged?
Partly clogged nozzles usually give you faded lines, missing bands, or weak color blocks instead of a fully blank page. That is a different problem from low ink, and it often shows up after the machine has sat unused for a while.
Run the printer’s built-in nozzle check first. Most inkjet models print a tiny grid or test pattern, and that pattern tells you which color is missing or weak. If the black grid has gaps, or one color bar looks faint, the output problem is in the ink path.
Use the maintenance menu in the printer software and run the normal cleaning cycle once. Then wait the recommended pause from the menu, which is often a few minutes, and print the test again. If the pattern improves but is still incomplete, a second cycle may help.
Do not keep cleaning in a loop. That can waste a lot of ink and still leave you with the same weak line. Two cycles is enough to tell you whether the printer is recovering. If there is no change after that, the problem may be a cartridge that is out of spec, an air gap in the ink path, or a deeper printhead fault.
A clean nozzle pattern should produce solid bars with no breaks.
- The black line should look even from end to end.
- Cyan, magenta, and yellow should each appear solid.
- Light striping means the printer is still starved in one channel.
For a broader look at print quality terms, the print manufacturer’s support articles and the ISO/IEC print quality standards used by many device makers are worth a read. They explain the kind of output defects you are seeing, even if the menu names vary by model.
Can paper type affect faded prints?
Yes, paper type can make a print look faded even when the ink and settings are fine. Plain paper, coated paper, and photo paper absorb ink differently, and the driver’s paper setting controls how much ink the machine lays down.
Picture this: you print a sharp image on cheap copier paper, then the same image on photo paper, and the second one suddenly looks fuller and richer. That is not magic. It is the coating doing its job and the driver giving the page a heavier ink load.
The most common mismatch is this:
- Plain paper selected, photo paper loaded: the print may look dull or undersaturated.
- Photo paper selected, plain paper loaded: the page can smear or take too long to dry.
- Wrong paper thickness setting: text and images can look lighter because the printer changes its feed and ink behavior.
If your output is light on plain paper, try a fresh stack from a dry package. Paper that has absorbed moisture can cause weak color and soft blacks. Keep it sealed until you need it, and store it flat.
A simple test helps here too. Print the same image on plain paper and photo paper using the matching driver setting for each. If the photo paper version looks normal and the plain paper version looks washed out, the printer is behaving as designed. The fix is not more cleaning; it is a better paper match or a higher quality setting.
When should you stop troubleshooting and get help?
You should stop after the basic settings check, one nozzle cleaning cycle, and a paper-type test if the page is still faded in the same way. At that point, the issue may be hardware-related, and more cleaning can burn through ink without fixing it.
Picture this: you have already confirmed ink levels, used the correct paper setting, and run a nozzle check, but the blacks still look thin or one color keeps disappearing. That is the point where further DIY steps can turn into wasted ink and more paper.
A service visit or manufacturer support call makes sense when:
- The nozzle check never improves after 1 or 2 cleaning cycles.
- The problem stays tied to one color channel.
- The printer shows normal ink levels but prints weakly across every setting.
- The machine has been unused for a long stretch and now cannot recover with normal maintenance.
Do not keep printing 20 copies hoping the output will “wake up.” It usually won’t. A faulty cartridge, a damaged printhead, or a driver issue can look like faded output, and the fix depends on the exact model. If you need the machine working for a deadline, the fastest path is usually model-specific support from the maker’s help page.
For the bigger picture on output quality, the hub on printer output quality and color management is the right next stop after this page.
A practical order that solves most faded prints
Picture this: you want one clear path, not a pile of guesses. The best sequence is usually to start with the cheapest checks and end with the ones that cost time or ink, because faded output usually has a simple cause.
Use this sequence:
- Check the ink level in each cartridge.
- Set the job to Standard or Best quality.
- Match the paper type to the sheet you loaded.
- Turn off Draft, Economy, and grayscale if they are not needed.
- Print a nozzle check.
- Run one cleaning cycle if the nozzle check shows breaks.
- Stop if the print is still washed out after that.
This order matters because the software settings solve a lot of weak prints before any maintenance does. If you start with cleaning, you may waste ink and still miss the real issue. If you start with settings and paper, you get a clear yes-or-no answer fast.
The rule is simple: settings first, maintenance second, hardware help last. That saves time, paper, and a good amount of frustration.
Key Takeaways
- Faded inkjet prints usually come from one of four things: low ink, light print settings, wrong paper type, or blocked nozzles.
- Draft mode is a common cause of thin text and dull color.
- Plain paper and photo paper need different driver settings.
- A nozzle check tells you whether the ink path is the problem.
- If one cleaning cycle does not help, stop and look at the cartridge or the printer’s support page.
Why are my inkjet prints so light?
Your inkjet prints are usually light because the job is set to a low-quality mode, the paper type does not match the sheet you loaded, or one color channel is not flowing well. Start with ink levels and print settings first, then run a nozzle check if the page still looks washed out.
How do I make printer ink darker?
Make the print darker by changing the quality setting from Draft to Standard or Best, matching the paper type in the driver, and turning off grayscale or ink-saving modes. If the page is still pale after that, the nozzle pattern may show a clog or weak channel.
Can paper type affect faded prints?
Yes, paper type can make a print look faded because plain paper and photo paper absorb ink differently. If the driver is set for plain paper but you loaded coated or photo stock, the output can look weak or flat. Matching the setting to the sheet often fixes it.
Drafted with AI; not yet reviewed by a person.